




Create AI Model Try-On for Free
If you sell clothes online, the model shots are the expensive part. Book someone, hire a room, post the samples out, shoot, wait on the edit. Then a second colourway lands and you do all five again.
That repetition is the actual problem. The garment did not change. The colour did. But shooting is priced per shoot, so three colourways cost three shoots, and a small range quietly turns into a production calendar.
Model Fitting takes a photo of the garment and gives you a photo of somebody wearing it. If you organise shoots in-house today, those five steps become two: upload the garment photo, say what the shot is for. Nobody gets booked and no samples go in the post.
The short version: a flat-lay product photo is the only thing you have to supply. Generate one image, check four details against the original, then generate the rest from that approved shot. You do not need a model photo, a studio or a background.
If your clothing reference shows a complete styled look, use this guide to control which garments and accessories transfer into the model try-on image before you generate.
What this replaces, in one picture
This is the working file behind everything below. Product photos on the left, generated shots filling the middle, social posts and one short video hanging off the right edge. One set of clothes, one afternoon, no one booked.
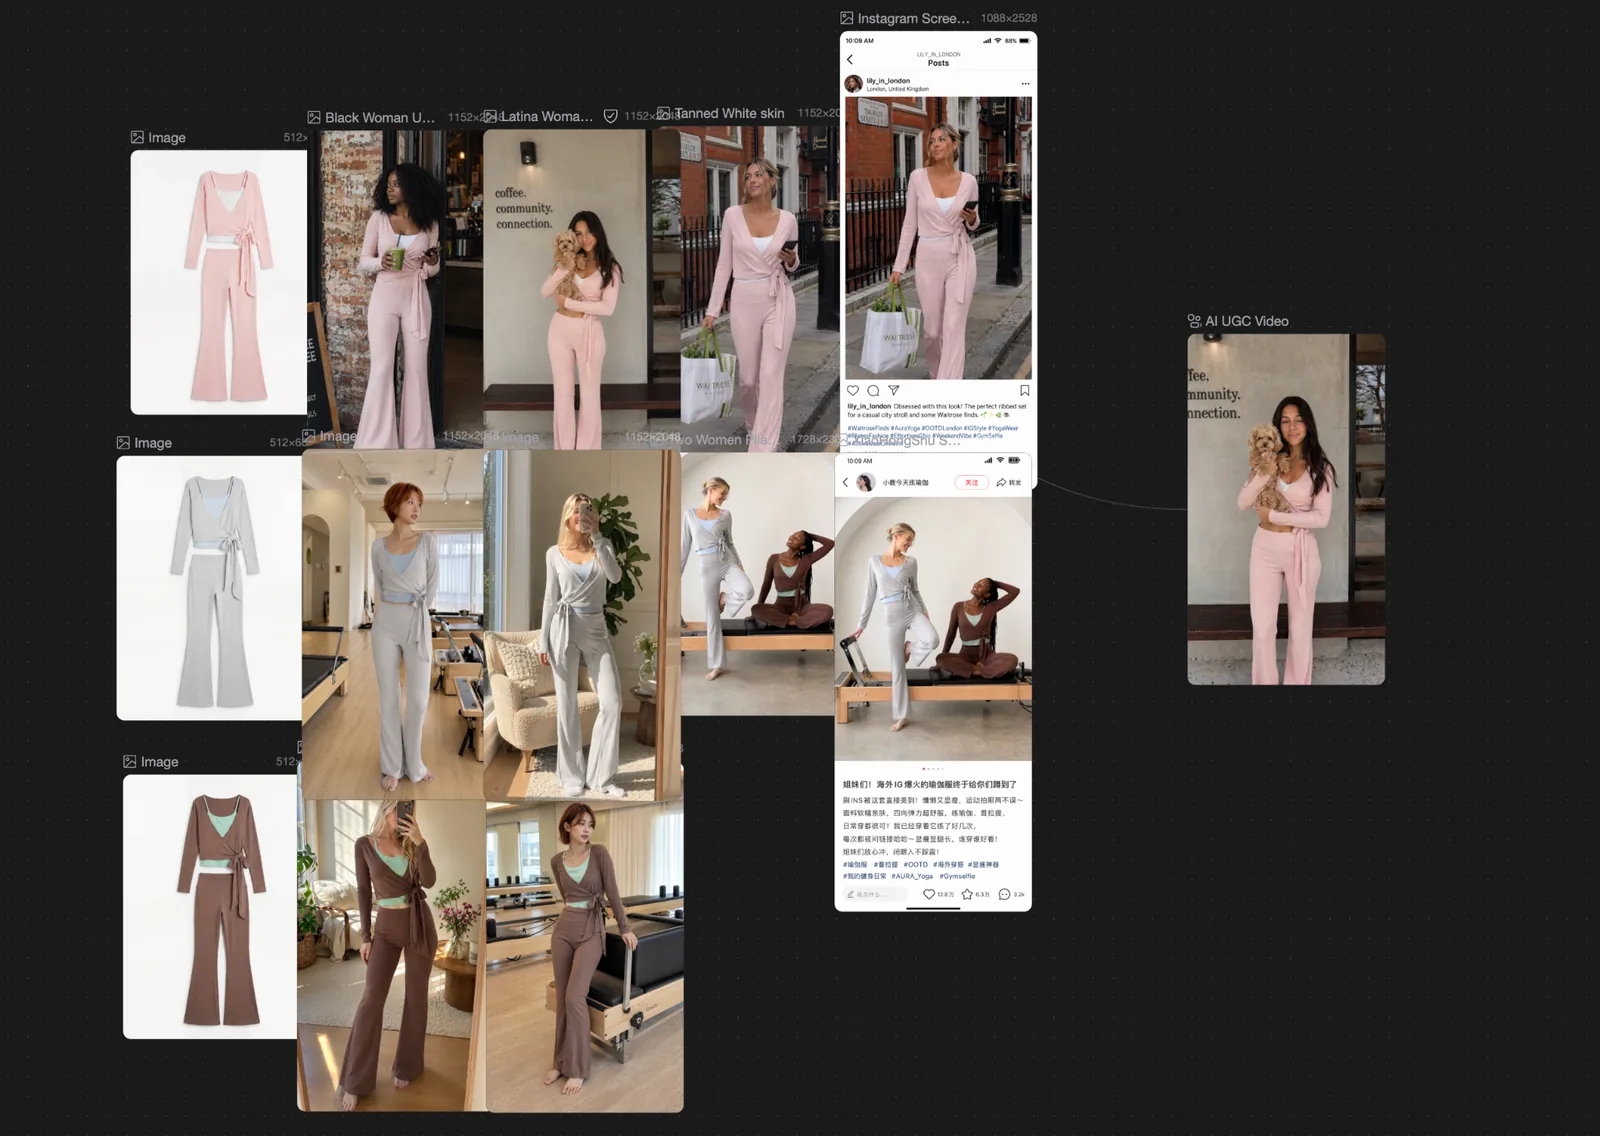
You can open it and poke around: the project behind this article.
The clothes are the only thing you have to supply
One photo of the garment. That is the required input, and it is the whole reason this works for a small range: you can start with what is already sitting in your product folder.
Everything else is optional and most of it you will not need on the first try. A model photo, a background photo, an aspect ratio, how many images you want, a written description of the person, a written description of the place.
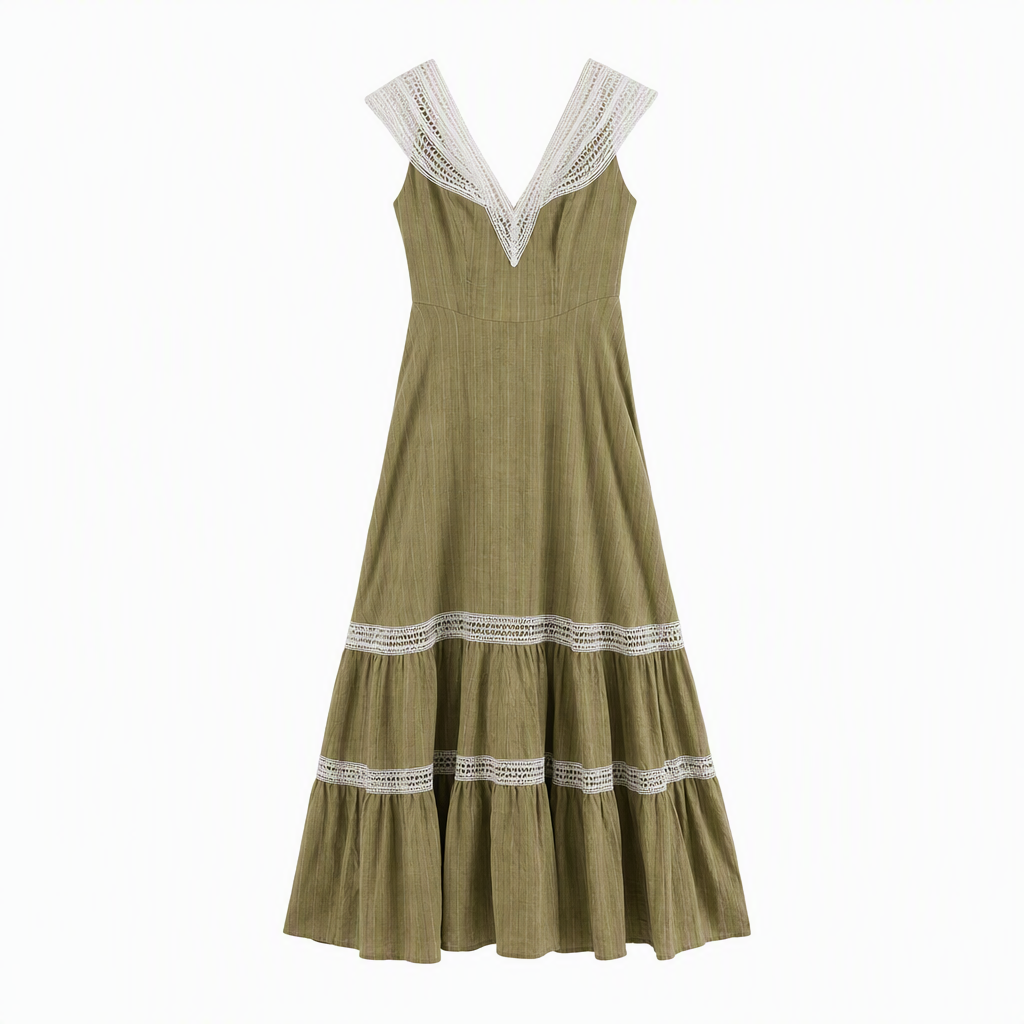
These three product photos are the entire input for every generated image on this page. No model, no location, no styling notes.
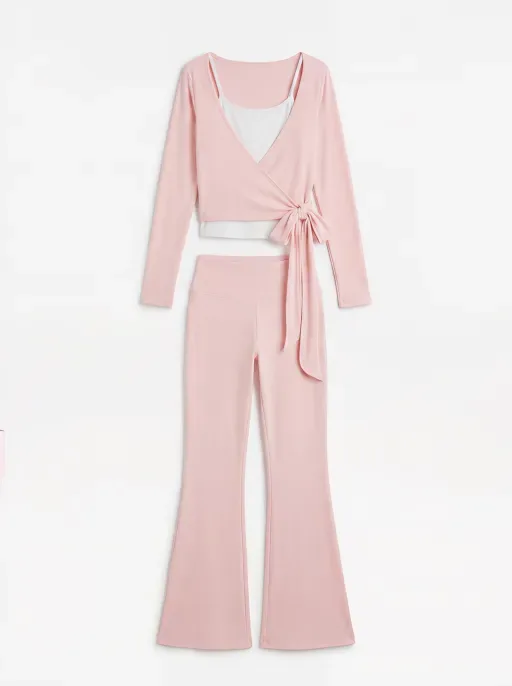
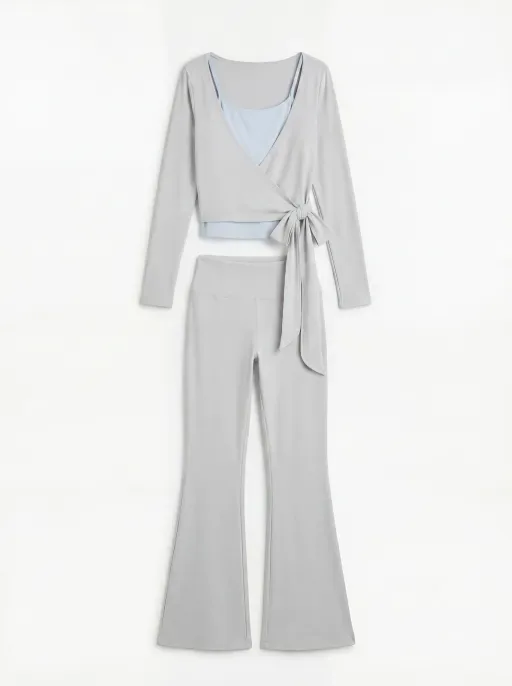
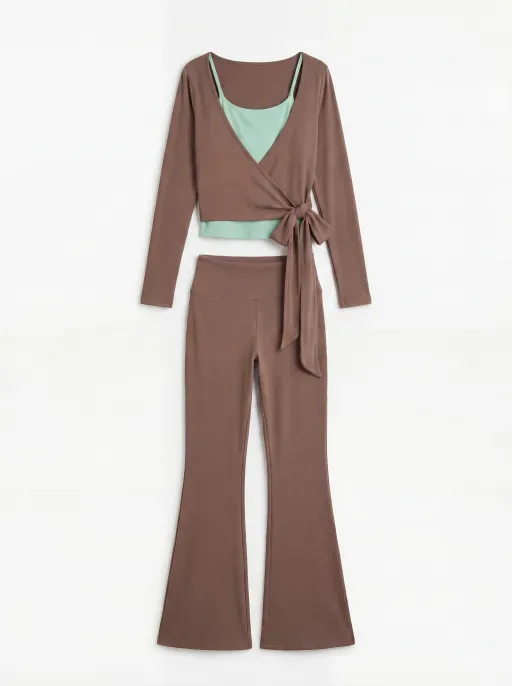
A photo shot flat on white works. So does one on a hanger. What hurts you is a picture where the garment is folded over itself, half in shadow, or so small in frame that the weave is not readable.
If you are still working out how to shoot the garments themselves, the wider workflow for photographing clothes without a model covers the step before this one.
Approve one image before you make thirty
The first image you approve becomes the reference for every image after it. Same face, same build, same hair, while the pose and the room change. That is what makes a product page look like one shoot instead of five.
It cuts the other way too. A mistake in image one rides along into images two through twelve, and you delete the lot. So the review that matters happens once, on one image, before there is a batch to review.
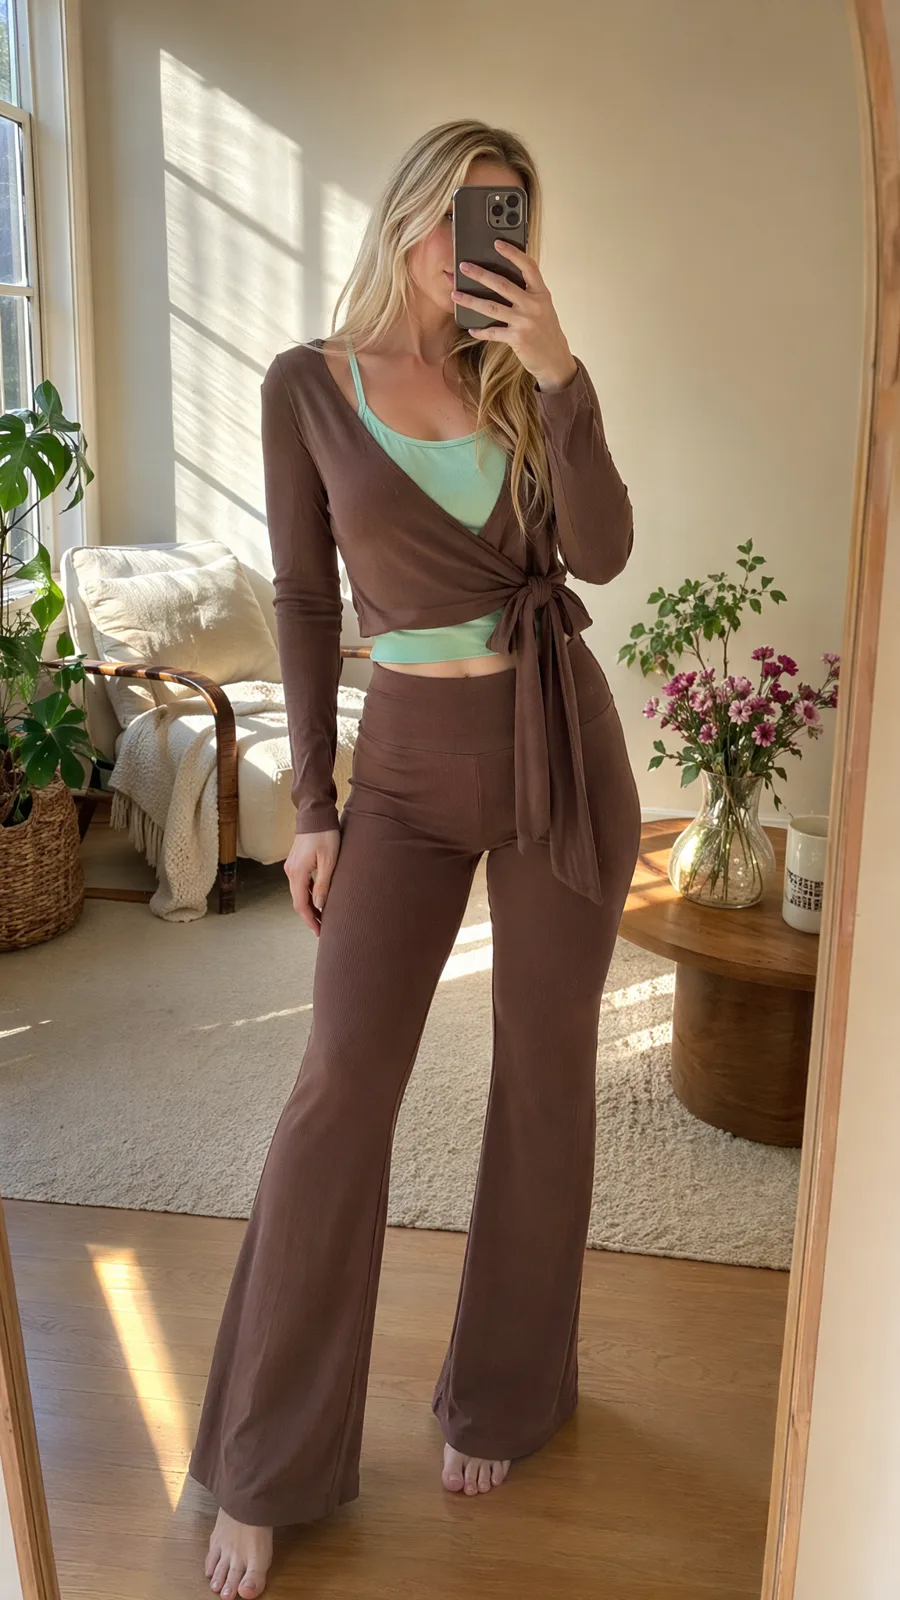
Look at what carried over. The wrap crosses the same way. The tie sits at the same point on the waist. The ribbing runs vertically and still reads as knit rather than printed stripes. The trouser hem flares from the knee, not the ankle.
Those four things are your check. If they are right in image one, keep going.
The detail that decides whether you can trust the batch
Main colour is easy to eyeball. What slips past you is the second colour.
This set has a contrast top layered underneath, and it is a different shade in every colourway: white under the pink, pale blue under the grey, mint under the brown. That inner piece is the first thing to get flattened into one generic shade across a batch, because it is small and because you are busy looking at the trousers.
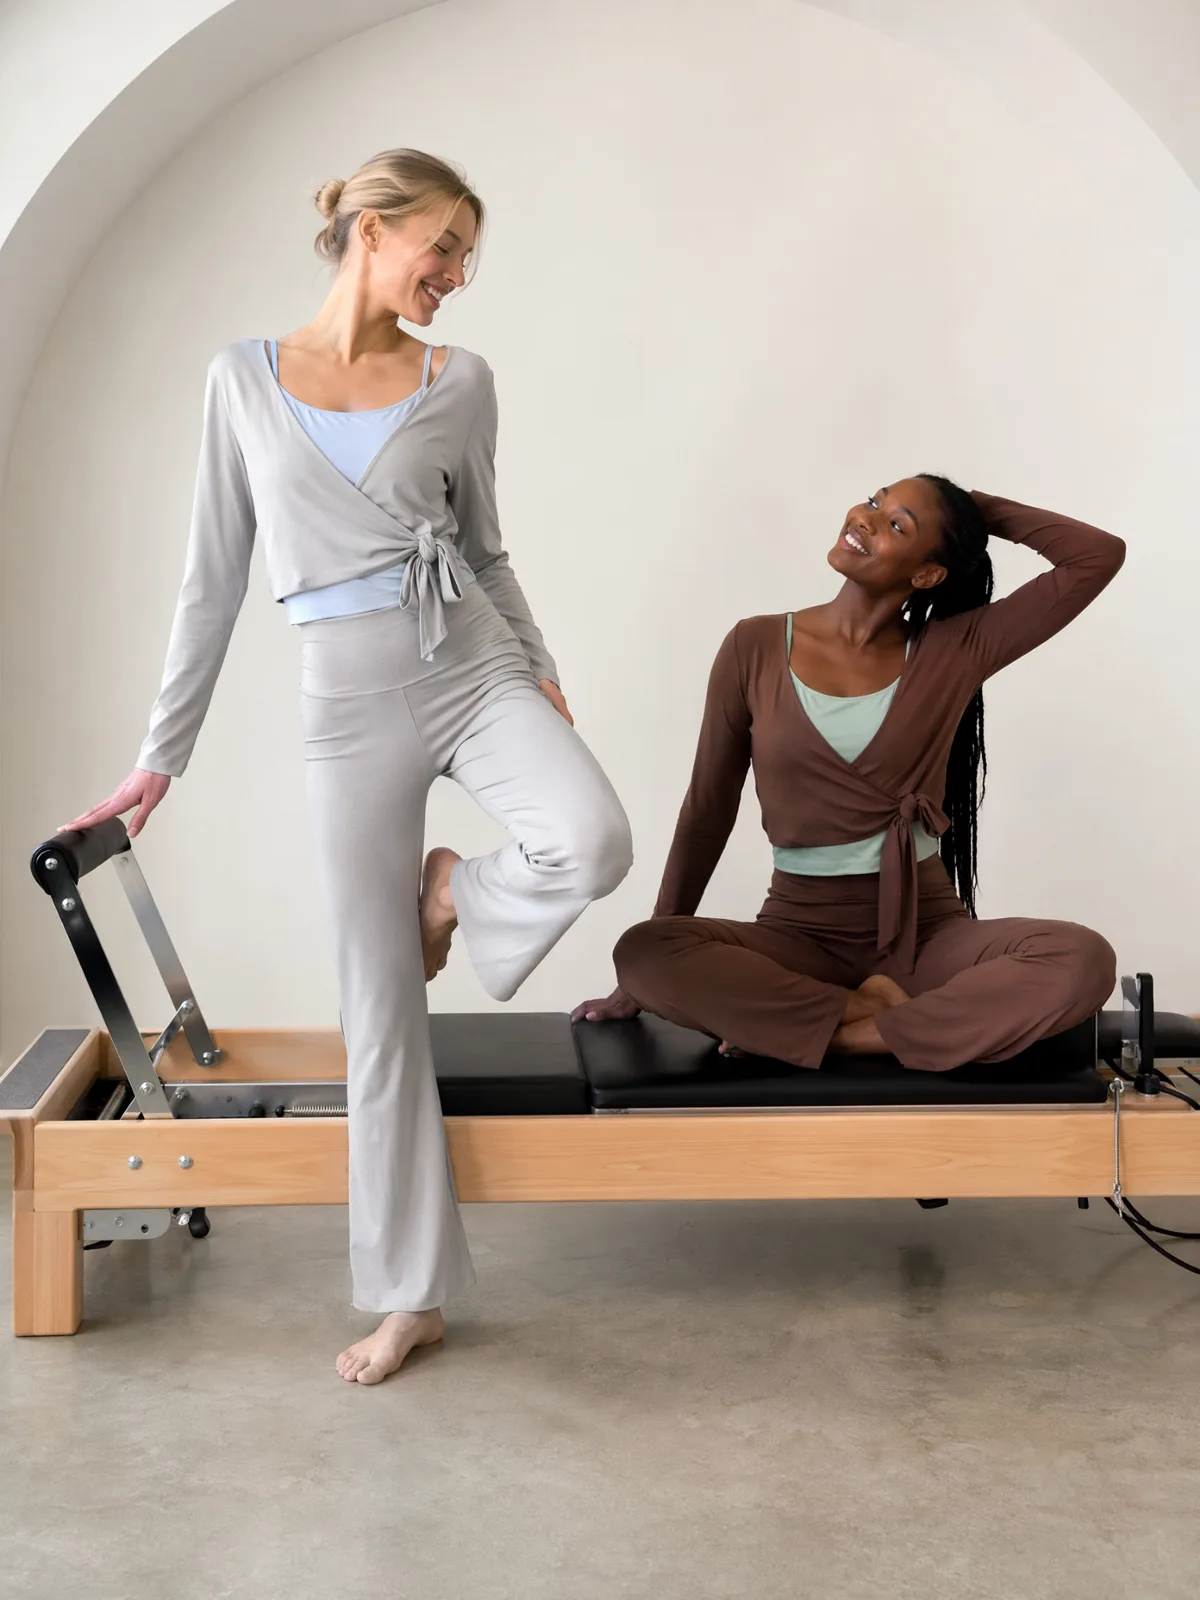
Both survived here, which is the result you want. Put two colourways side by side and a drift shows up in about a second. Reviewed one at a time, in a folder, at four in the afternoon, it will not.
The second thing that slips is the room. Ask for a clean studio shot from a product photo that happens to be lying on a poolside towel and you can get the towel back. Say the setting out loud in your request rather than assuming the background of your source photo is invisible.
One product, a whole cast
Same three photos. Different women, different places, no faces supplied by us.
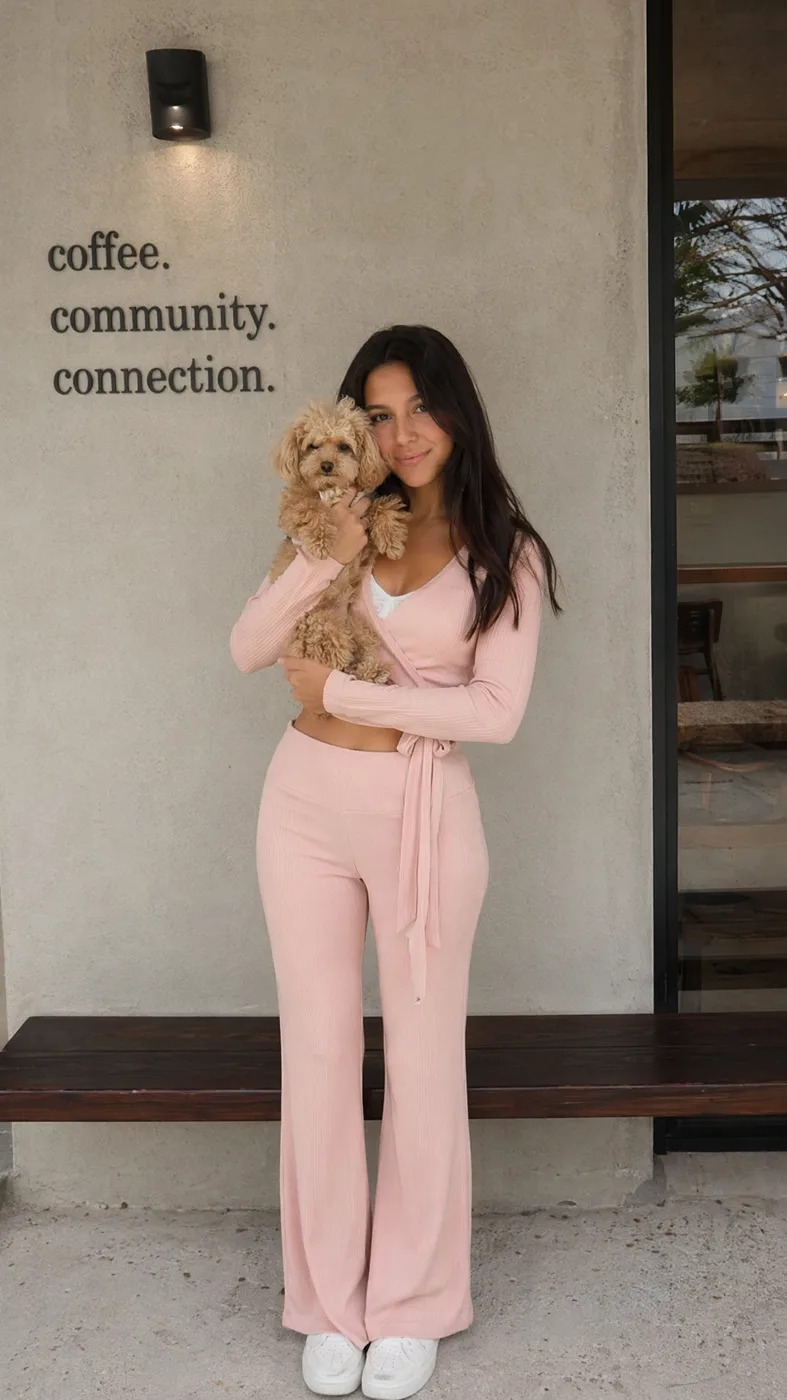
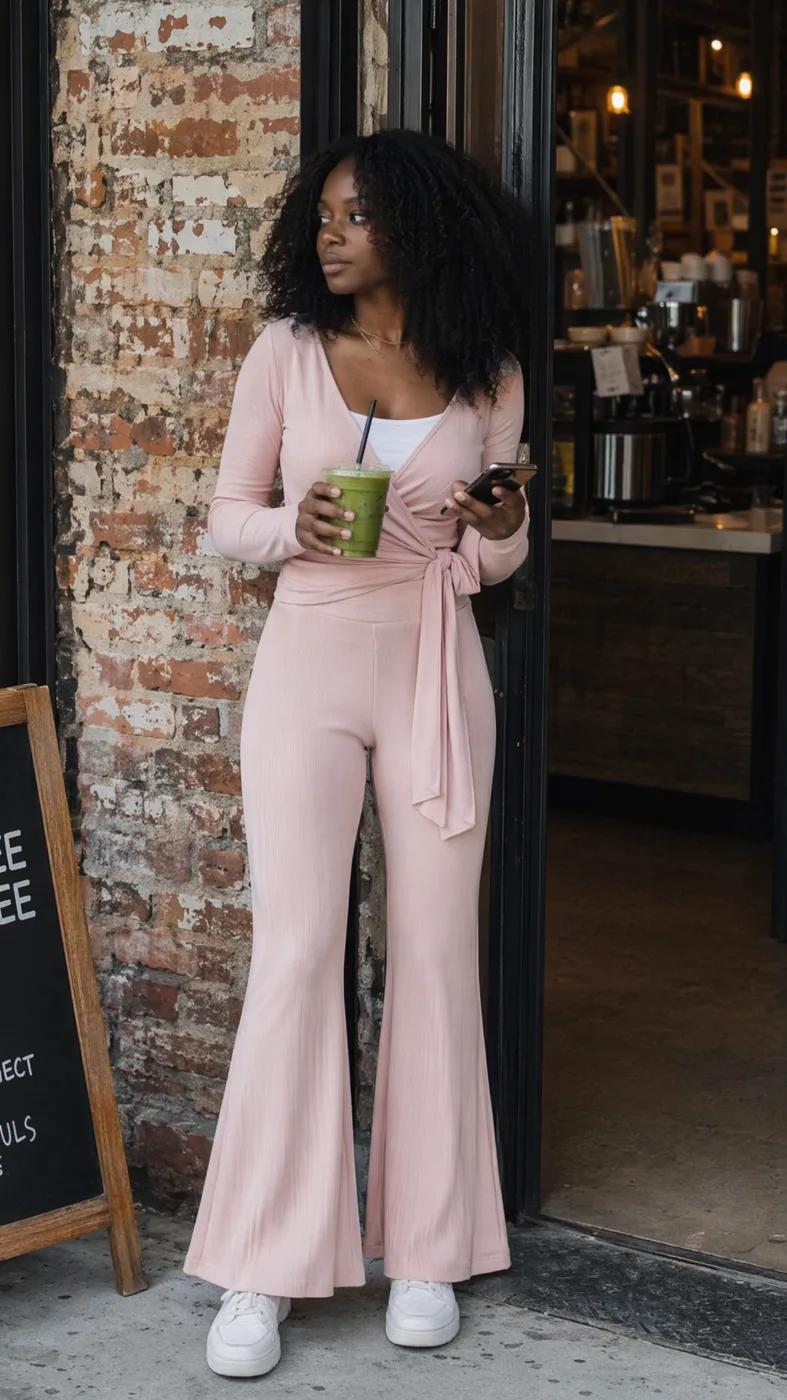
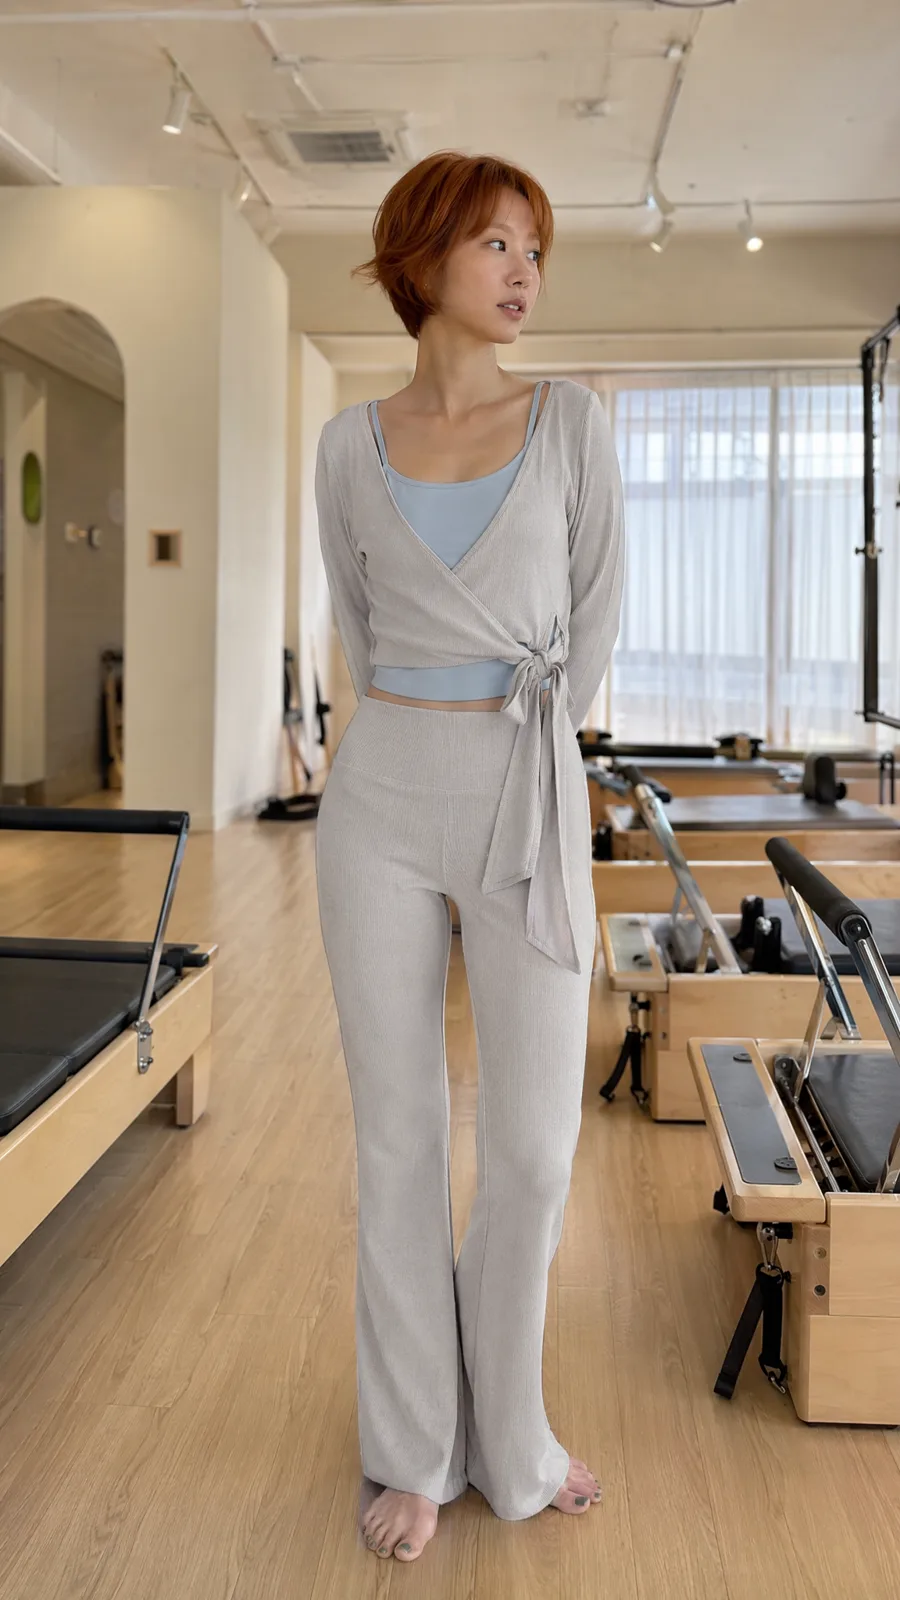
This is the part that changes the arithmetic for a small brand. Casting four women for one loungewear set is a day of somebody’s life plus a budget line. Here it is the difference between one request and four.
If you already have a model you use, hand over her photo alongside the garment and the system works to keep that person rather than inventing one. We did not, so there is nothing on this page demonstrating it. Worth knowing it exists before you assume you are stuck with strangers.
Pet clothing is its own thing
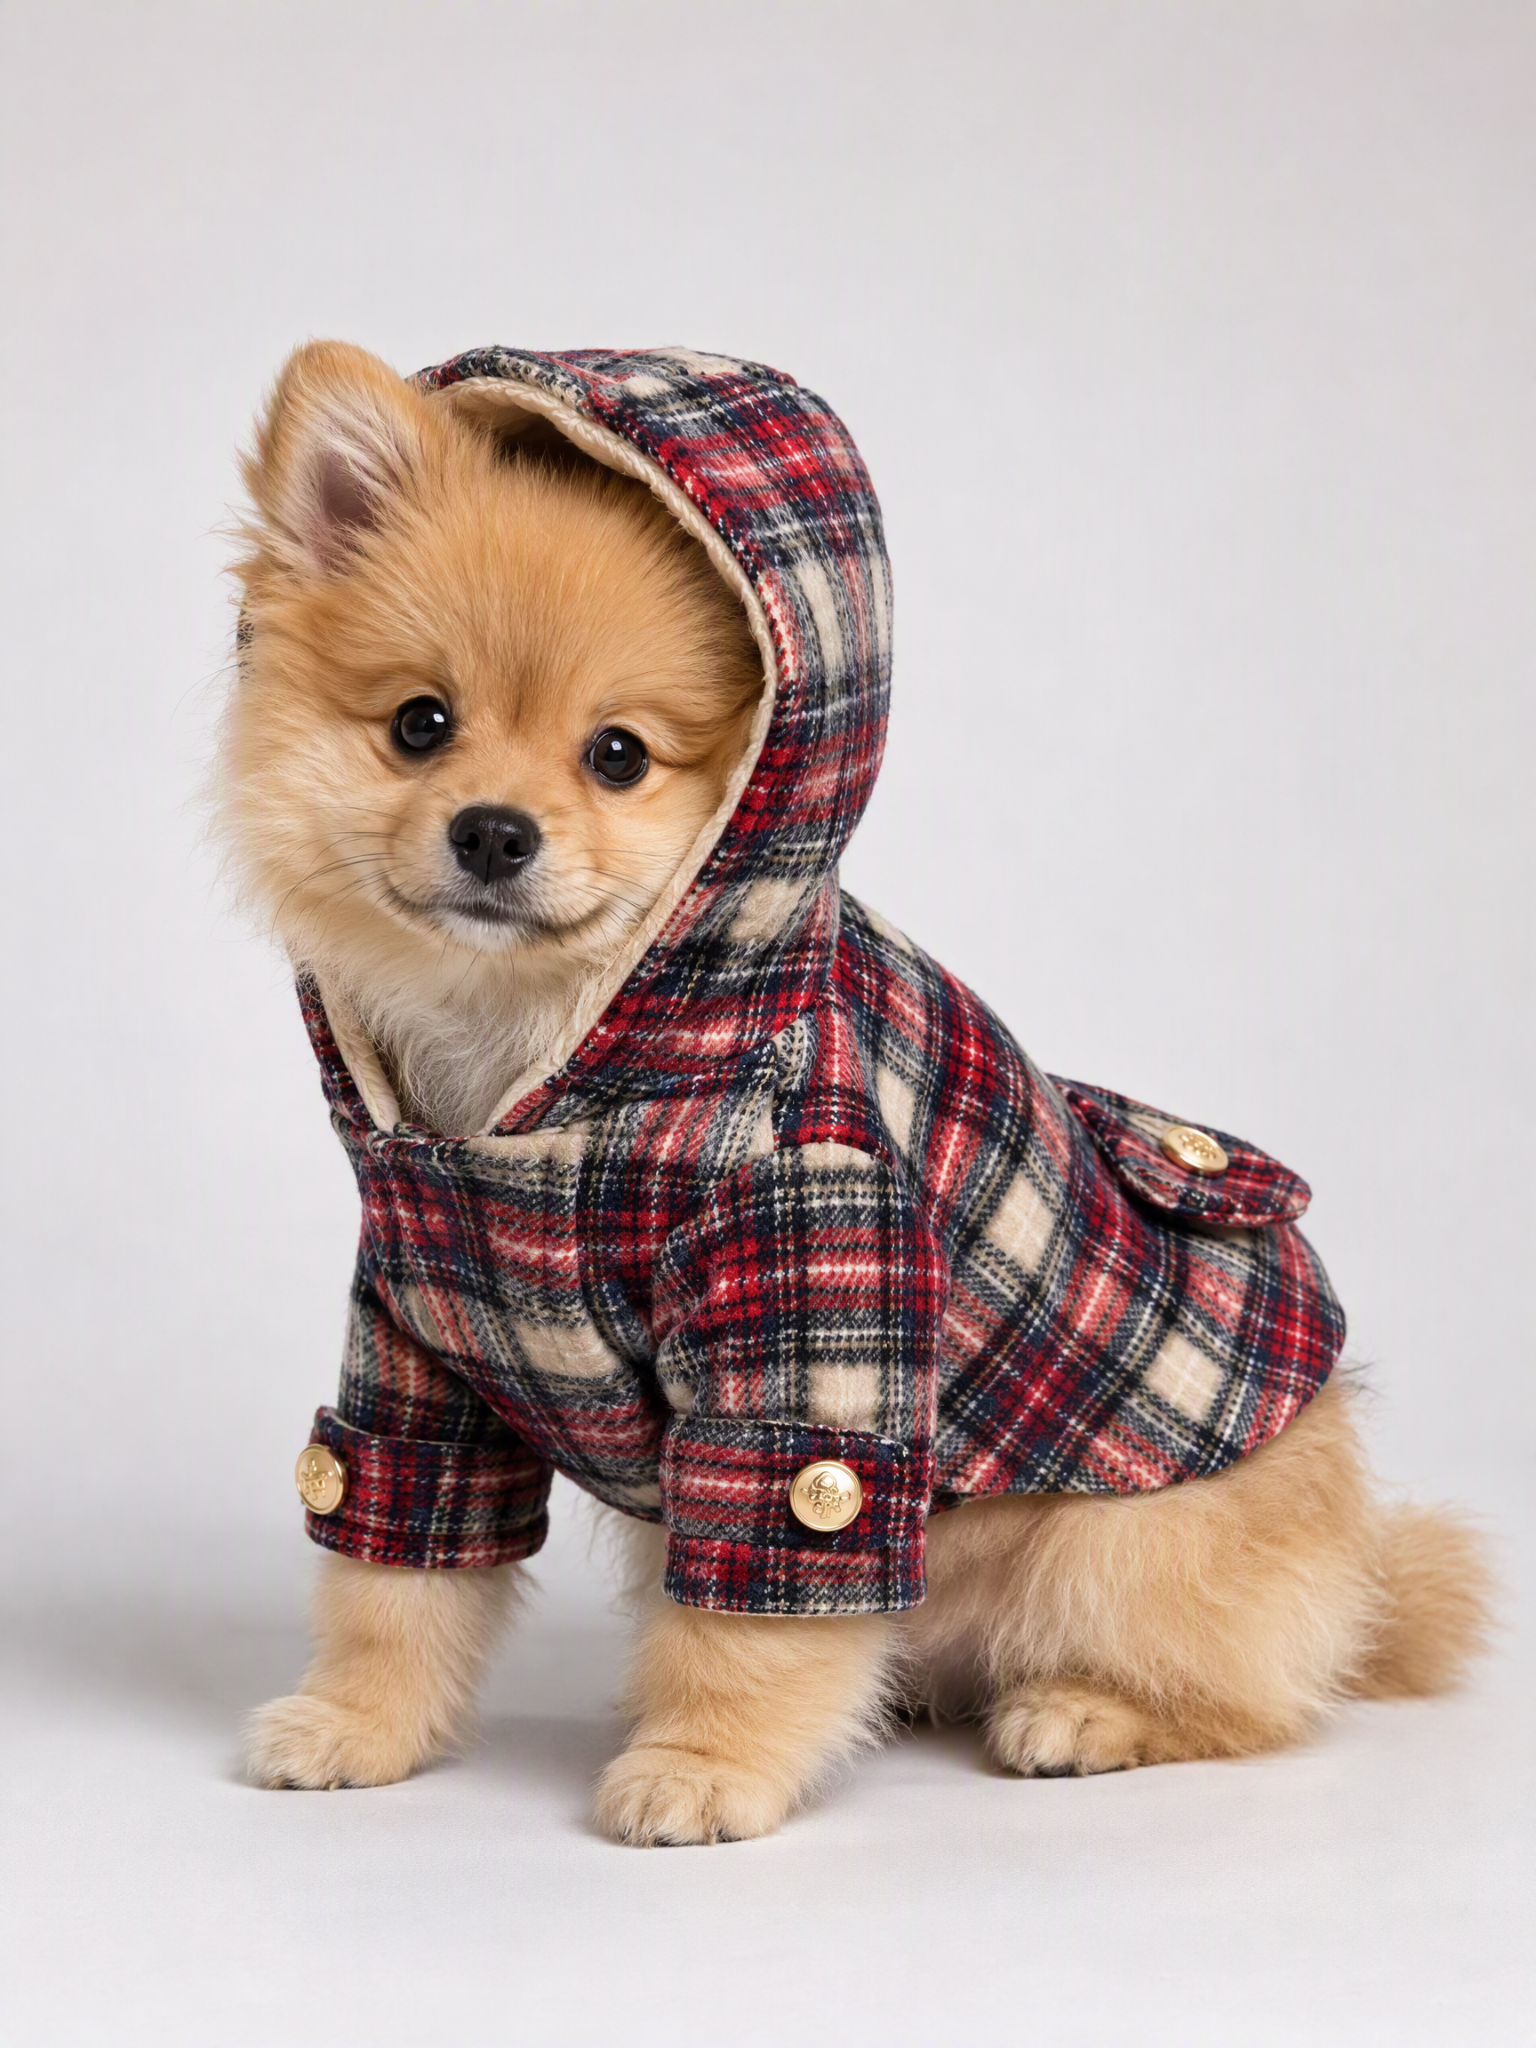
The same idea works for pet clothes, but do not review them with the same eyes. Fit means something else on a dog. So does pose. A photo that would look stiff on a person often reads as fine on a spaniel, and a shot of a dog mid-wriggle reads as charming rather than broken.
If you sell both, keep two separate checklists. Borrowing the apparel one will make you reject good pet shots and accept bad ones.
For six real examples, cats included, see how to turn pet clothing photos into dog and cat product images.
When the setting does the selling
Sometimes the job is not proving the clothes fit. It is showing where somebody would wear them. A courtyard in late afternoon. A hotel terrace. The bit of a holiday you are actually selling.
Decide which of the two you are making before you generate, because they are reviewed differently. A studio shot fails if the seams are soft. A lifestyle shot fails if the whole thing feels staged, even when every seam is perfect.
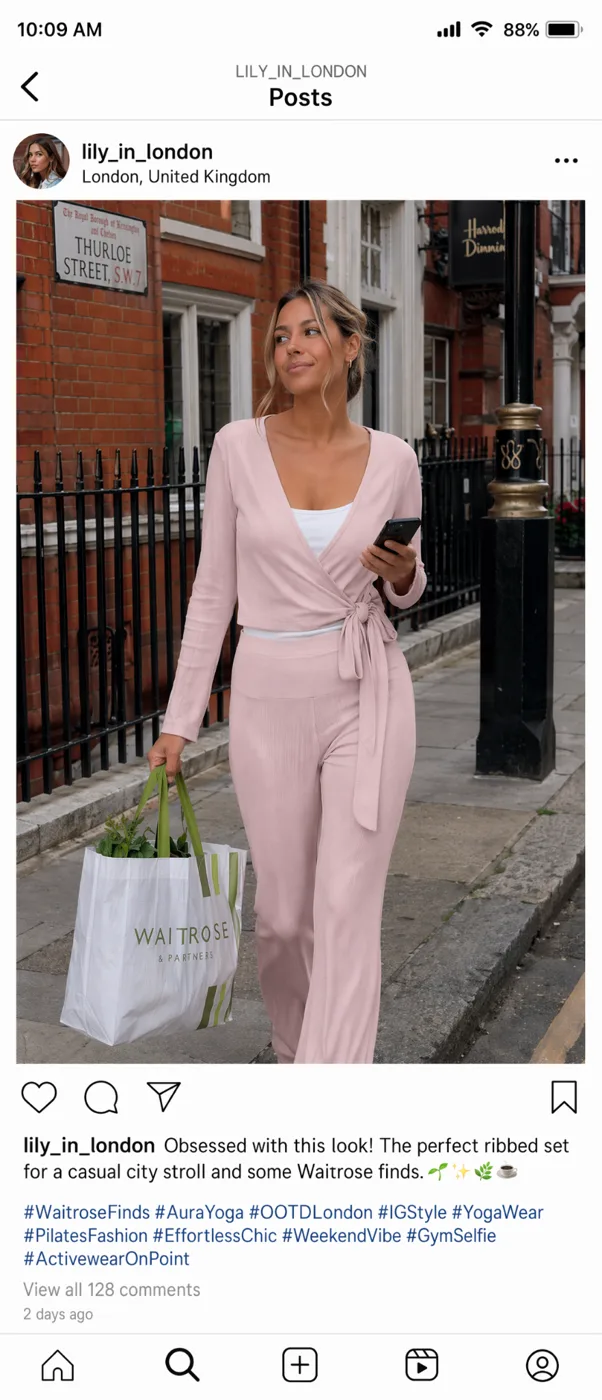
Where these images actually go
Almost nobody stops at the image. In this same file, two of the outputs were dropped into post layouts, one for Instagram and one for Xiaohongshu, with the caption and tag conventions each platform expects.
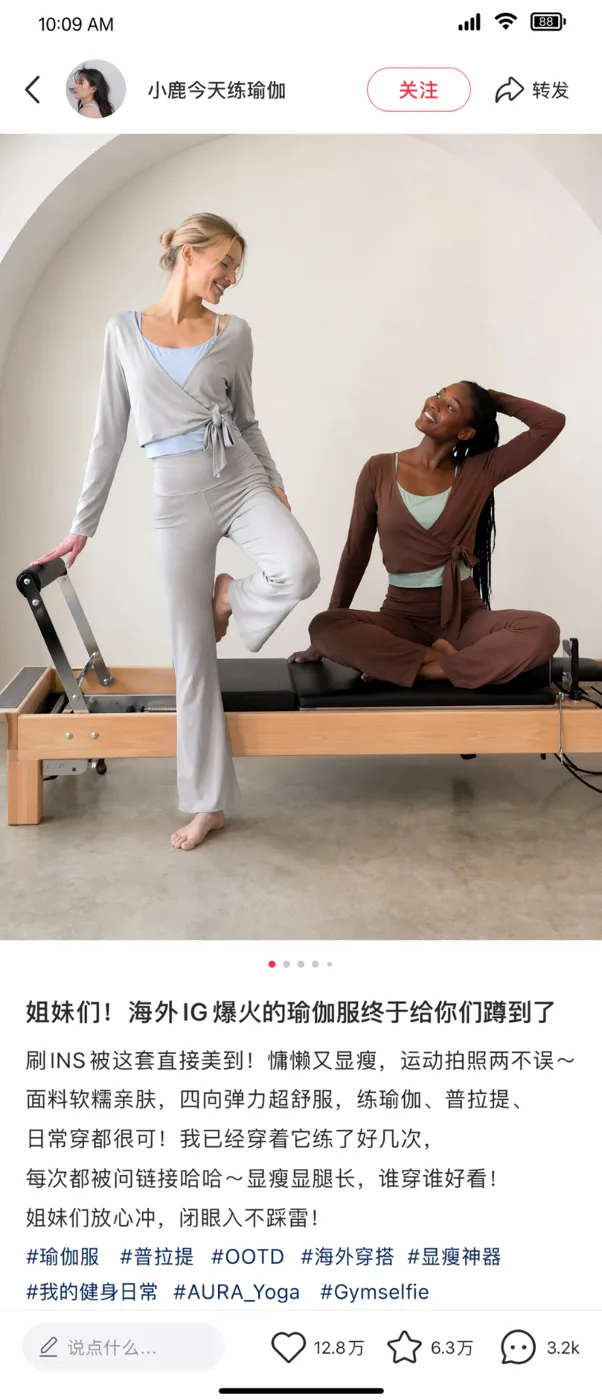
One shot also got turned into a few seconds of video. You can see it on the right edge of the working file further up.
Turning one of these into an actual ad is a separate job with its own rules. Our guide to making UGC-style ads with AI for Shopify products picks up where this page stops.
Treat all of this as packaging. A tidy post layout does not fix a garment that came out wrong, it just ships the mistake to more people.
What to write in the request
Short. Really short. For a clean product photo like the ones above, this was the whole instruction:
Generate a realistic model try-on image for this ribbed wrap set.
Use a bright, natural indoor setting.
People tend to over-write this part. They describe the fabric, the mood, the target customer, the season. Then the result drifts and they cannot tell which sentence caused it. Start thin and add one thing at a time.
The exception is when your source photo has more in it than the thing you are selling. Say you are using a styled look with a blazer, a bag and shoes in frame, and you only sell the trousers. Then you have to name what stays out:
Use the black T-shirt from image 2 and the brown wide-leg trousers from image 1.
Do not include the blazer, inner lace top, clutch or shoes from the styled photo.
Generate one plus-size model try-on image in a natural studio style.
I will be straight about this one: our batch never tested it. Every photo we started from was a single product on white, so there was nothing competing to leave out. Naming the extras is the documented way to handle a styled source and it is what I would do, but I have not watched it hold up under pressure.
Before any of this goes near a product page
- The four details. Closure, tie or fastening, texture, hemline. Compare against the product photo, not against your memory of it.
- The second colour. Linings, inner layers, trims, contrast stitching. Review colourways side by side.
- The same person. Across a set, the face and build should hold. If she quietly changes between image four and image five, the page reads as three different products.
- The room. Did you get the setting you asked for, or the one that was in your source photo?
- Nothing extra. No shoes, bags or jackets that you do not sell and cannot ship.
That last one bites hardest. An image can be beautiful and still be a returns problem, because the customer bought what they saw.
The three things that stop people
“It will not really be my garment.” That is the right worry and it is why the fidelity check above exists rather than a claim. The two-colourway frame is the test I would run on your own product: put two versions side by side and see whether the small contrast piece holds. If it drifts there, it will drift everywhere, and you will know inside a minute.
“One example proves nothing.” Fair. This page is one real project, run once. It shows that packshot-only input produces worn images and that the garment survived across colourways, people and settings. It does not show how often that holds, and I am not going to dress a single run up as a rate.
“Can I put it straight on the product page?” Not on my say-so. This is a working account of one project rather than a release note, and this is an image generator rather than a product-page builder. What I ran was a test build of the Skill; the button above opens the live one, so read the behaviour here as indicative and check it against your own range. Run the checklist above on your own range before anything ships. One practical point on cost: images generated on the free tier come out watermarked, so a subscription is part of the plan if these are going on a live product page. Uploads occasionally arrive in a state the generator cannot read, and when that happens you are asked to upload the file directly, once; if it still cannot be read, re-export the photo instead of sending the same file again.
Questions people ask
Do I need a photo of a model?
No. The clothes are the only required input. Supply a model photo when you want to keep using the same person across a catalogue. Skip it when you just need shots and do not care who is in them.
Why bother naming the items I do not want?
Because a lot of fashion source imagery is a full outfit. If you only sell the top, saying so keeps the jacket and the bag from tagging along into your product page. With a single product on a white background there is nothing to exclude, so you can skip it.
Can one set of product photos cover more than one market?
Ours did. The same three photos produced shots that suit quite different audiences, which is why a single upload can feed more than one regional plan. Still review each image against the market it is going to, rather than assuming one result travels.
Studio or lifestyle?
Studio when the job is showing the product cleanly. Lifestyle when the setting is part of what you are selling. Pick before you generate, not after.
What is the fastest way to sanity-check a batch?
Open two colourways side by side and look at the small contrast details. Drift shows up there before it shows up anywhere else.
Create AI Model Try-On for Free
About The Author